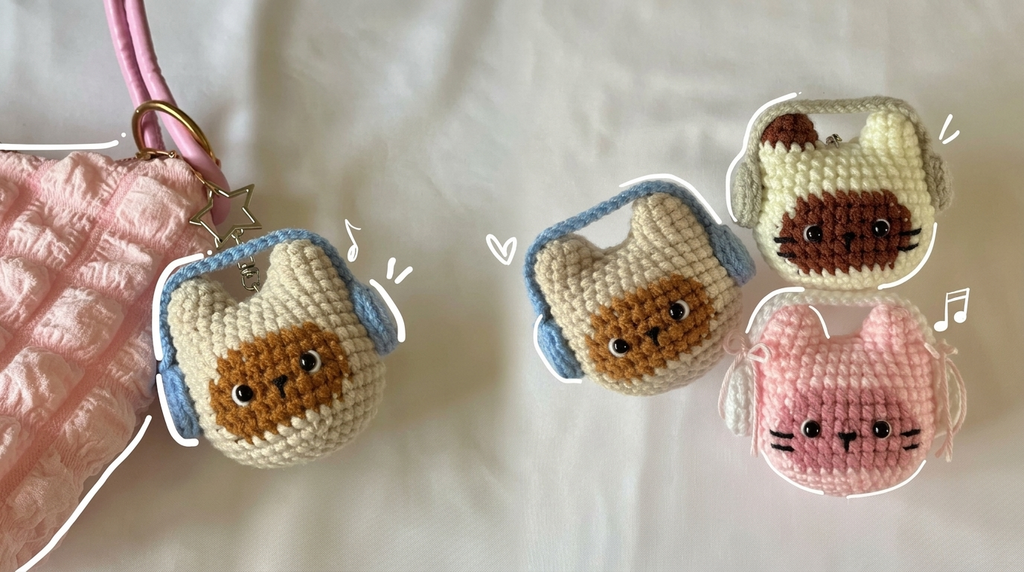
Few things make me smile like a tiny kitten with a pair of headphones on. This little cutie uses simple stitches, a couple of color changes, and a sweet pair of blue headphones. It can feel a bit challenging, but I truly believe you can do it.
The Kitten with Headphones
This kitten is worked in beige with a brown patch, and its ears are made first and joined together as you go. The color changes happen in the middle of the rounds, so the brown patch grows right into the fabric. Soft blue headphones sit over the ears, and little embroidered details give the face its sweetness. A white line around each eye and a tiny black nose make it look extra cute.
If you’d like to play with colors, the same method works with any two-color combination for the body and patch. You could also pick a different shade for the headphones.
Related Posts:
- Crochet Breakfast Set: Tiny Treats You Can’t Eat but Will Love
- Crochet Bubble Bag: A Chic and Timeless Accessory
- How to Crochet a Textured Lemon Peel Pouch
Materials and Tools
- Beige yarn
- Brown yarn
- Blue yarn (for the headphones)
- White yarn (for embroidering around the eyes)
- Black yarn (for the nose)
- Crochet hook
- Stitch marker
- Stuffing
- Darning needle
- 2 plastic eyes, 4 mm
- Glue
- Pins
Stitch by Stitch
- MR: magic ring, used to start the ears and each headphone piece
- sc: single crochet, used for nearly every round
- inc: increase, two single crochet in the same stitch
- dec: decrease, used in rounds 15 to 20
- ch: chain, used to join the ears and to make the headphone band
- sl st: slip stitch, used to close the headphone rounds and to work the band
- sc in back loop only: used in round 3 of the headphones
- Front loops: the final six stitches are closed through their front loops
Construction
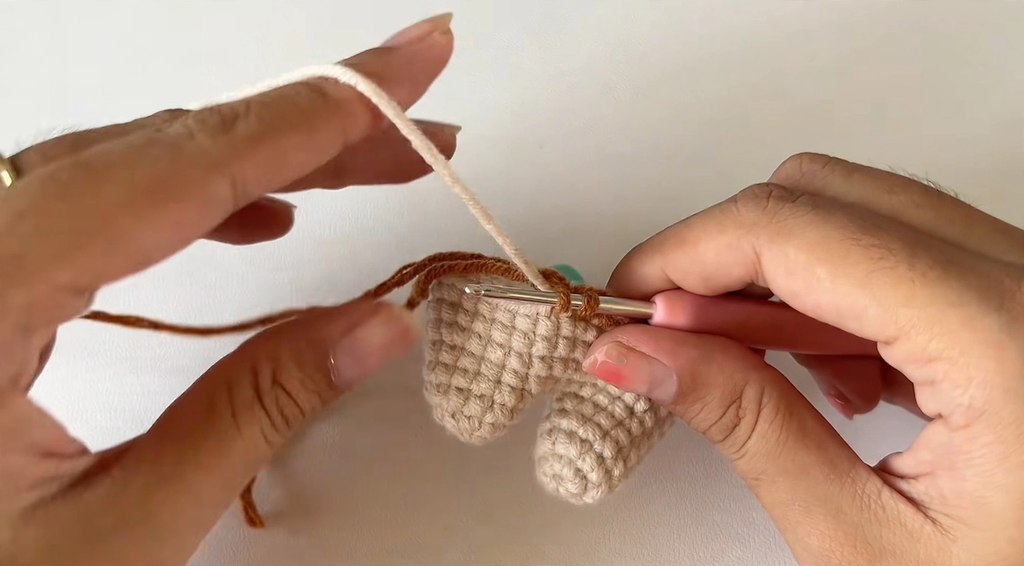
The Ears
Use beige yarn.
First ear
- Round 1: Make 6 sc into a MR. Pull the yarn tail tightly and mark the very first stitch with a stitch marker.
- Round 2: Make an increase in every stitch. Insert your hook into the first stitch and make 1 sc, then insert your hook into the same stitch again and make another sc. That’s one increase. Work an increase in each of the remaining five stitches.
- Round 3: Make 1 sc in every stitch, for 12 sc in total.
Cut the yarn.
Second ear
Make the second ear just like the first, but do not cut the yarn at the end, because we’re connecting the two ears.
Connecting the ears
- On the second ear, make 3 chains.
- Take the first ear and insert your hook into its last stitch.
- Grab the yarn from the second ear and make 1 sc. Mark this stitch with a stitch marker.
- Make 1 sc in every stitch of the first ear. Counting the marked stitch, there will be 12 sc on the first ear. Place the remaining yarn tail onto the hook as you work and carry it, so you don’t need to weave in the end later.
- Crochet into the upper sides of the three chains. Make 1 sc in each chain, which gives 3 sc.
- Continue onto the second ear. Insert your hook into the very first stitch of the second ear and make 1 sc, then 1 sc in each stitch of the second ear, for 12 sc in total.
- You’ve now reached the lower sides of the three chains. Make 1 sc into each chain.
The Kitten
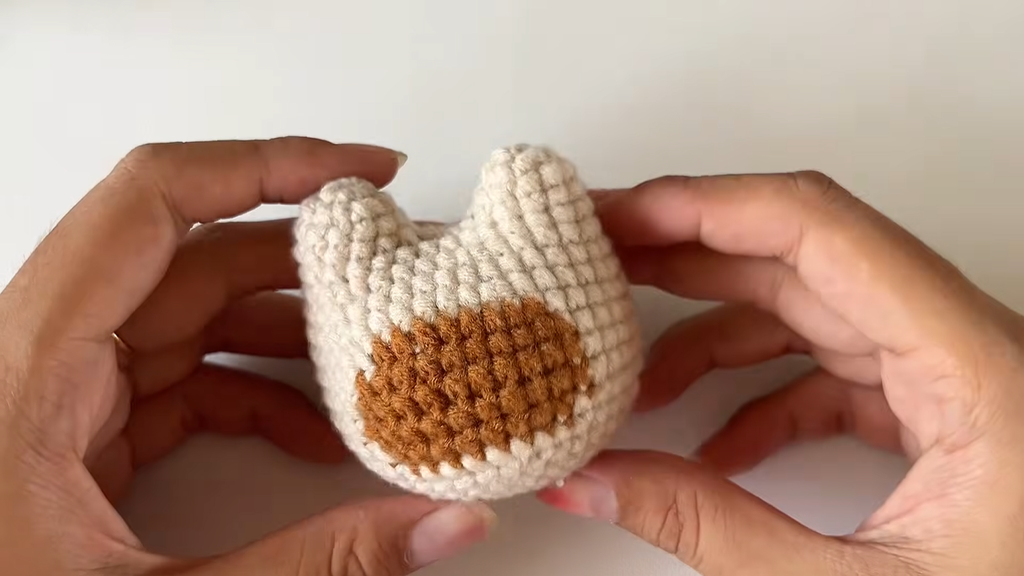
- Round 4: This is the round you just finished, with 30 sc in total. Place your stitch marker on the final stitch of the round.
- Round 5: Make 1 sc in each stitch, for 30 sc.
- Round 6: Make 4 sc, then 1 inc. Repeat this pattern five more times.
- Round 7: Make 1 sc in each stitch, for 36 sc in total.
- Round 8: Make 5 sc, then 1 inc. Repeat this pattern five more times.
Changing colors
- Round 9: Make 13 sc with beige. In the 14th stitch, do not finish the stitch. Put the brown yarn on top of your hook and pull the new yarn through the two loops. That’s how you change colors. With brown, make 8 sc, and in the last stitch of the brown section don’t finish the stitch either. Grab the beige yarn and pull it through the two loops. Then make 20 sc with beige until the end of the round.
- Round 10: Work beige single crochet until the 13th stitch, where you change to brown. I did not carry the yarn all the way around, so when I picked up the yarn from the other side I left quite a large loop so the fabric doesn’t become too tight. Make 10 sc with brown, and change back to beige in the last stitch. Make 19 sc with beige until the end of the round.
- Rounds 11 and 12: Exactly the same as round 10.
- Round 13: Use the same color-change method as round 9. Make 4 sc, changing to brown in the last stitch. Make a single crochet with the brown yarn, and at the end change the color back to beige. With beige, make 20 sc until the end of the round.
There are no more color changes in the upcoming rounds, so cut the brown yarn.
- Round 14: Make 1 sc in each stitch, for 42 sc in total. The loops left from the color changes can get in the way of the stuffing because the yarn wasn’t carried around, so I cut those loops. It’s okay if you don’t want to do that.
- Round 15: Make 5 sc, then 1 dec. Repeat this pattern five more times until the end.
- Round 16: Make 4 sc, then 1 dec. Repeat this pattern five more times.
- Round 17: Make 3 sc, then 1 dec. Repeat this pattern five more times.
Start stuffing after round 17.
- Round 18: Make 2 sc, then 1 dec. Repeat this pattern five more times.
- Round 19: Make 1 sc, then 1 dec. Repeat this pattern five more times.
Stuff tightly before you start the final round.
- Round 20: Make 6 decreases in total.
Closing
Cut the yarn, leaving a long tail. With a darning needle, insert the remaining yarn tail into the front loops of the remaining six stitches from behind. After going through all six stitches, pull the yarn tightly and insert the needle back into the center. Insert the needle into another place two or three more times, then cut the end
The Headphones
Use blue yarn. You’ll make two matching pieces.
First piece
- Round 1: Make 7 sc into a MR. Pull the yarn tightly, then insert your hook into the very first stitch you made and make 1 sl st.
- Round 2: Make ch 1, insert your hook into the same stitch where you made the slip stitch, and make 1 inc. Make an increase in each of the remaining stitches. At the end, connect the round with a sl st into the very first stitch.
- Round 3: Make ch 1, then make 1 sc in each stitch, working in the back loop only.

At the end of round 3 you can either connect with a sl st and weave in the ends, or use this invisible method. Insert your darning needle into the very first stitch of round 3 and come back to the final stitch. Insert it into the back loop and the loop underneath it, pull the yarn, and weave in the end as you normally would.
Second piece
Make another piece just like the first, but this time connect the end with a slip stitch.
The band
- After connecting the second piece, make 23 chains.
- Bring the first piece and connect it from behind. Insert your hook into the last stitch of the first piece and make two slip stitches. Make one sl st in the final stitch and another sl st in another stitch.
- Make ch 1, then come back to the chains and make 1 sl st into each chain, all the way back to the second piece.
- Insert your hook into the second stitch of round 3 of the second piece and make 1 sl st.
- Cut the end and weave in the ends.
The Face and Finishing
- Eyes: Use two 4 mm plastic eyes. Glue them onto the brown patch, four stitches apart. Mark the position first with pins to secure the placement, then glue them on.
- Eye details: With white yarn, embroider a white line around the eyes to make the kitten look cuter.
- Nose: Separate the black yarn into two strands. Using a darning needle, embroider the nose in the middle between the two eyes.
- Assembly: Sew the headphones onto the kitten using the same color of yarn. This can be a little challenging for beginners, so you can also use glue if possible, but I still think it’s best to sew. While sewing, be careful not to pull the yarn too tightly, because it can deform the shape of the kitten.
Wearing Your Kitten with Headphones
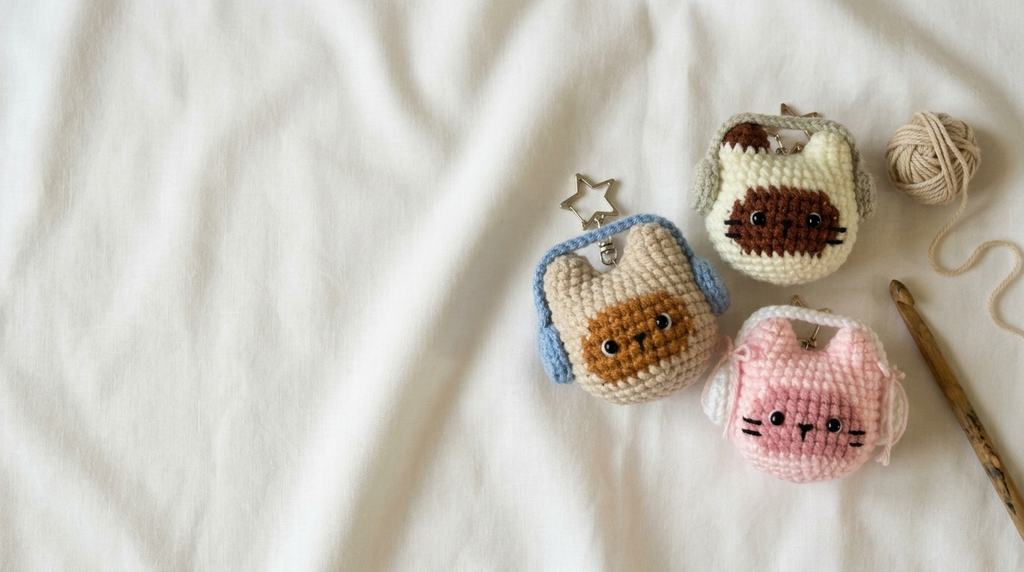
This little kitten is such a sweet companion to show off. It looks adorable on a shelf or desk, or tucked into a basket of handmade treasures. It also makes a heartfelt handmade gift for a cat lover or a music fan. You could make a whole group in different color combinations, each with its own headphones.
Keeping Your Kitten with Headphones Fresh and Lovely
Because the headphones are sewn on, I like to spot clean with a damp cloth and a little mild soap rather than soaking the whole piece. Let it air dry completely before putting it back on display. Keep it out of direct sunlight so the colors stay bright, and store it somewhere dry. If the glued eyes ever loosen, a dab of glue will set them right again.
I hope you enjoy making this little music-loving kitten as much as I did. Save this pattern to your Pinterest board so you can find it whenever you’re ready to stitch, and share a photo of your finished kitten with me. I’d love to see your color choices!
Follow us on Pinterest and subscribe to the Newsletter so you don’t miss a thing!
3 Comments