
I love projects that feel like a hug in your hands, and this little teddy bear is exactly that. It’s made entirely from fluffy yarn pom-poms, and the method is wonderfully simple. Let me walk you through how I make it.
Crochet Teddy Bear: A Cuddly Pom-Pom Plush Toy
The Teddy Bear
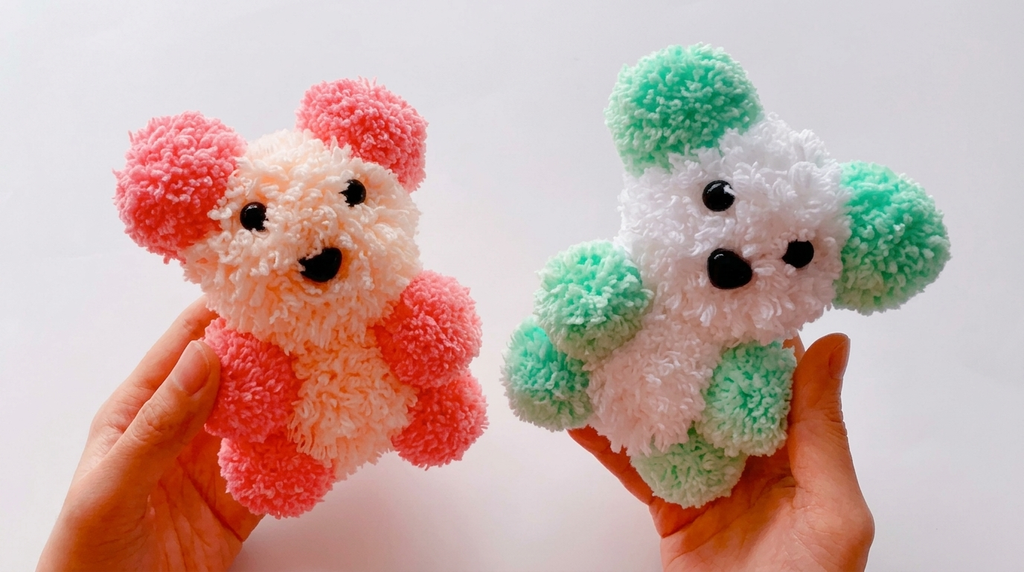
This teddy bear is a soft, squishy plush toy built from yarn pom-poms in three different sizes. Every pom-pom is full and round, so the finished bear has a plush, cuddly texture that begs to be squeezed. It’s a very beginner-friendly way to make a toy, because the whole technique is wrapping, tying, and trimming.
For color, I love the idea of classic honey-brown for the whole bear, or a soft cream for a gentle, nursery-style look. You could also pick a different shade for the ears to give your bear a little personality.
Related Posts:
- Crochet Cake Roll Charm: A Sweet Whimsical Keepsake
- How to Crochet a Spooky Amigurumi Bat: Step-by-Step Guide
- How to Crochet Mini Apples: A Sweet and Whimsical Delight
Materials and Tools
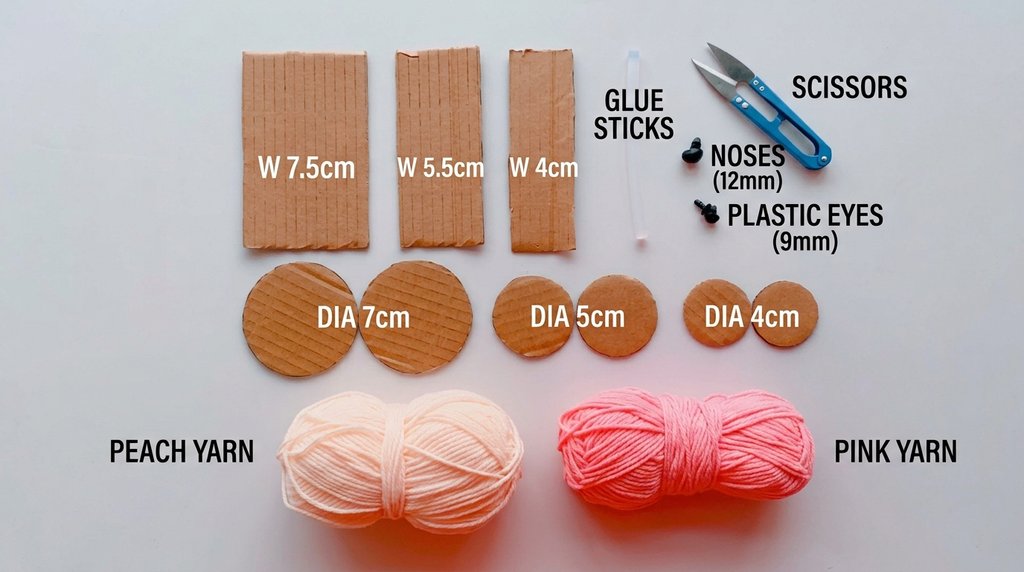
- Yarn
- Medium-sized cardboard (used for wrapping the yarn)
- Two medium round cardboard circles (used for trimming)
- Scissors
Stitch by Stitch
This project doesn’t use any crochet stitches. Here are the techniques I use instead:
- Wrapping: I wind the yarn around the medium cardboard 100 times.
- Tying: I knot a separate length of yarn around the center of the wrapped loops.
- Cutting: I cut the loops open after tying.
- Trimming: I trim the pom-pom into a round shape between two round cardboard circles.
- Joining: I fix all the finished pom-poms together to form the bear.
Construction
Making the first pom-pom
I start with a medium-sized piece of cardboard, which I use to make the ear part. I wrap the yarn around the cardboard 100 times. Once all 100 wraps are done, I cut the yarn.
Next, I bend the cardboard slightly so I can slide the loops off. Then I take a separate length of yarn and lay the loops across the middle of it. I tie a firm knot around the center of the loops to hold everything in place. After that, I cut open the loops.
Trimming the pom-pom
Now comes the shaping. I take two medium round cardboard circles and place the yarn between them. Then I trim along the curve of the circles. Once that’s done, I remove the loops and place the pom-pom between the two circles again, this time to trim it even and neat. When it’s tidy, I have one finished pom-pom.
Pom-pom sizes
The bear uses pom-poms in three sizes:
- Medium: make 3
- Small: make 4
- Large: make 2
Assembly
Once all the pom-poms are ready, I fix them together, and my teddy bear is complete.
Wearing Your Teddy Bear
This little bear isn’t something you wear, but it has plenty of sweet uses. It makes a lovely plush toy for a child’s room, a cozy shelf decoration, or a handmade gift for someone who loves soft, cuddly things. You could also hang it as a charming accent in a nursery or on a bag.
Keeping Your Teddy Bear Fresh and Lovely
To keep your bear looking plump and fluffy, brush it gently with your fingers to lift the yarn back into shape. If it gets a little dusty, a soft shake or a light dab with a damp cloth works well. Keep it away from sticky or wet spots, and store it somewhere dry so the pom-poms stay fluffy and round.
I hope you enjoy making this adorable bear as much as I do. If you do, save this tutorial to Pinterest so you can find it again, and please share your finished bear with me. I would love to see your own cuddly creation.
Follow us on Pinterest and subscribe to the Newsletter so you don’t miss a thing
3 Comments