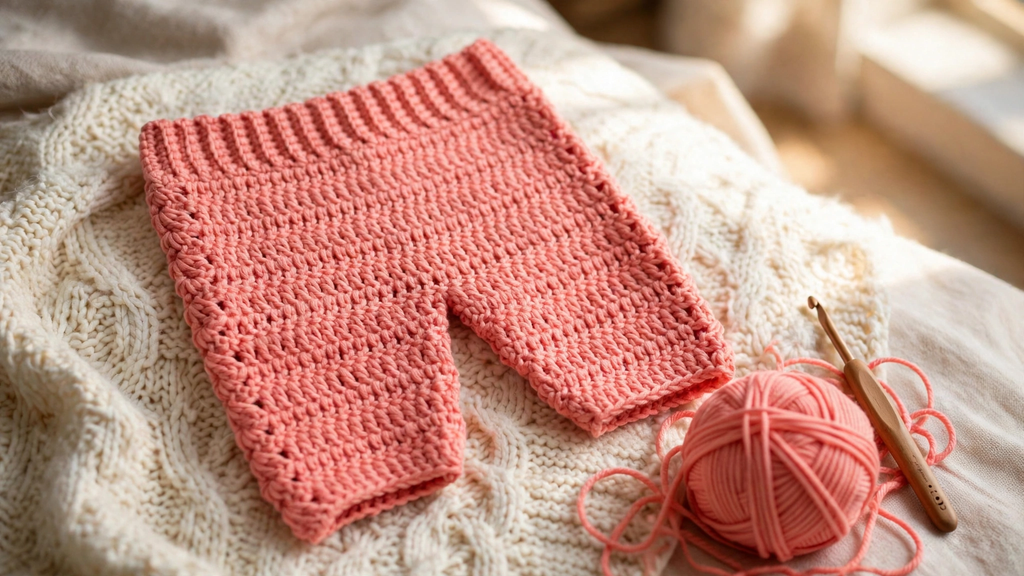
I’m sharing a pair of baby leggings that are as cozy to make as they are to wear. They have a stretchy ribbed waistband and a pretty shell stitch pattern that runs all the way down the legs. The stitches are simple, so this is a lovely project to settle into.
The Baby Leggings
These leggings have a stretchy ribbed waistband that looks just like the ribbing you see on the bottom edge or cuffs of a cozy sweater. Below the waist, a shell stitch pattern starts right under the ribbing and flows down both legs, giving the little pants a delicate, textured look. I made mine in a soft shade called Old Pink in 100% cotton yarn, which gives the fabric a gentle, cozy feel.
The pattern uses basic stitches and techniques, so it works nicely for beginners as well as for anyone who wants a relaxing make. This version is for the size 0 to 6 months. Soft pastels such as pink would be lovely, and so would any color that suits the little one you’re crocheting for.
Related Posts:
- Crochet Baby Pants: Ribbed Little Pants with a Tie Waist
- Crochet Baby Hat: A Cozy Little Beanie for Tiny Heads
- Crochet Baby Romper: Sweet Stripes for Tiny Wiggles
- Crochet Baby Booties: Tiny Steps in Soft Yarn
Materials and Tools
- Yarn: 100% cotton yarn in the color Old Pink (color 47), 2 skeins for the size 0 to 6 months
- 4 mm crochet hook
- Stitch markers
- Tapestry needle
- Scissors
Stitch by Stitch
- Slip knot: to start the foundation chain
- Chain (ch): the foundation chain, turning chains and the chain-1 in each shell
- Single crochet (sc): worked into the back bumps of the foundation chain, then in the back loops only for the ribbing rows, and around the waist for the first round of the middle section
- Slip stitch (sl st): to join the two ends of the ribbing and to join every round
- Double crochet (dc): the main stitch for the middle section and the legs
- Shell stitch: skip 2 stitches, then 2 dc, ch 1, 2 dc all into the same stitch
- Double crochet 2 together (dc2tog): the decrease that shapes the legs
Construction
The Ribbing
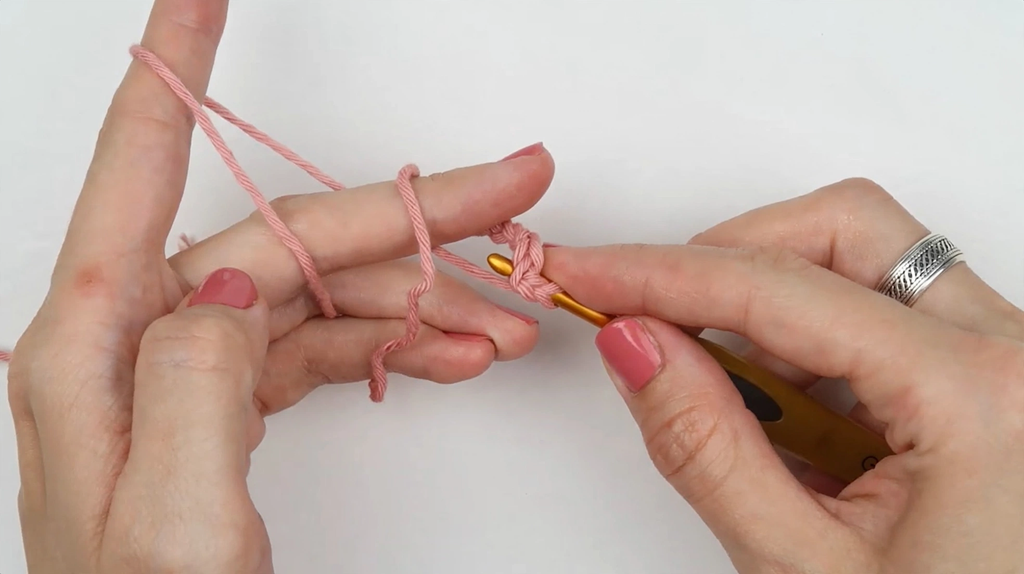
I start with a slip knot, insert the hook into the loop, and gently adjust the tightness of the yarn around the hook. Then I make a foundation chain of 8 chains.
Row 1: I skip the first chain and rotate the foundation chain so the side with just one loop is facing up. Those loops are called back bumps. I work 1 sc into each back bump all the way across, which makes 7 sc in total. A stitch marker in the first stitch of the row is optional, but I like using one and moving it up to the next row as I go. I find it especially helpful for beginners and for anyone who sometimes loses track of their stitches.
Row 2: I ch 1 and turn. If you look at your first row from the top down, you will see two loops. The one closer to you is the front loop and the one further away is the back loop. From this row on, I work in the back loops only. I make 1 sc in the back loop of each stitch across to the end of the row.
Row 3: I ch 1, turn, and work 1 sc in the back loop of each stitch across.
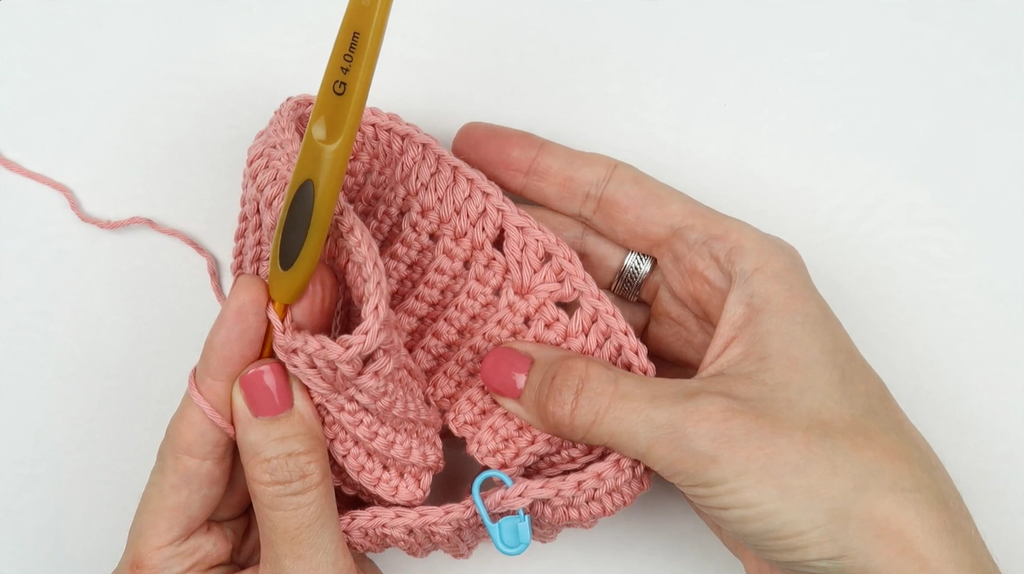
Rows 4 to 70: At the beginning of each row I ch 1 and turn. Then I work a row of sc into the back loops only. The rows quickly form a fabric very similar to the ribbing you see on sweaters, which is exactly what we need. I continue until I reach row 70, counting the first three rows too.
Joining the ribbing: I line up both ends of the ribbing and make sure it isn’t twisted or uneven. Then I join the two ends together with slip stitches, one stitch from each end at a time. I can use both loops or just one loop of each stitch. To make a slip stitch, I insert the hook into the stitch, grab the yarn, and pull it through the stitch and the loop on my hook. I work 7 sl st in total to close the ribbing.
The Middle Section
From here on I work in rounds instead of rows. I join each round with a slip stitch and work around the hip area rather than up and down. The ribbing has a right and a wrong side. The wrong side is the one where you can see the seam of slip stitches, so I keep that side on the inside and work with the right side facing out.
Round 1: I ch 1 and work 1 sc into each row end of the ribbing all the way around. Because the ribbing is 70 rows long, this gives me 70 sc. I keep my stitches nice and even, remembering one row, one sc. I join the round with a sl st into the very first stitch of the round.
This slip stitch does not count as a stitch. It’s only there to keep the round together, and I skip it in the next round. I make one new slip stitch for each round, and I turn my work after each round.
Round 2: This round is a tiny bit different, because here I use the double crochet, a much taller stitch than the single crochet. I ch 2 as the turning chain and turn my work. I skip the slip stitch, which is the very first stitch after turning, and work 1 dc into each of the first 15 stitches.
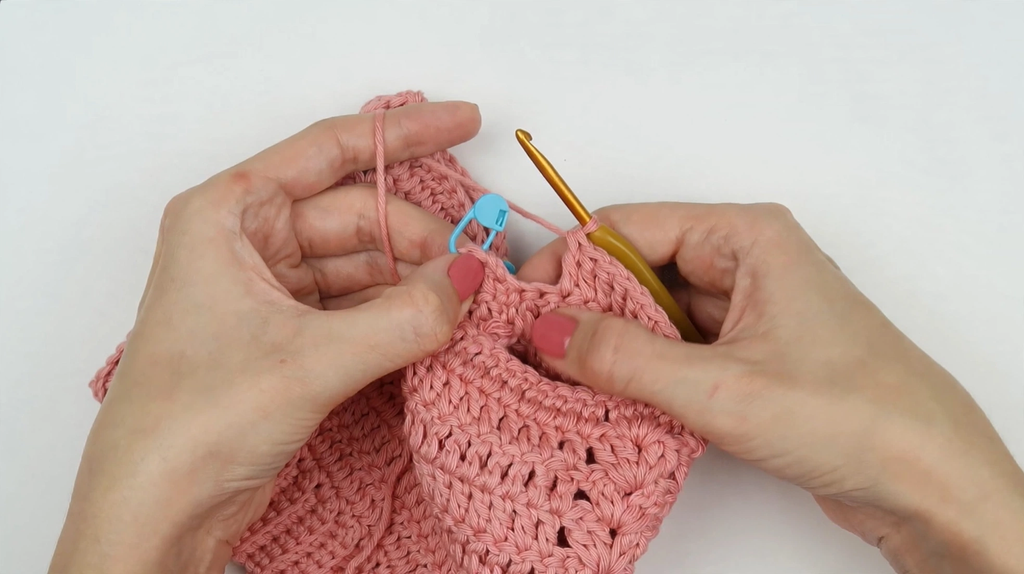
To make a double crochet, I yarn over, insert the hook into the stitch, yarn over and pull through. That leaves 3 loops on the hook. Then I yarn over and pull through the first 2 loops, and yarn over and pull through the remaining 2 loops.
Next comes the first shell. I skip 2 stitches, then work 2 dc, ch 1, 2 dc into the same stitch. We aren’t gaining or losing any stitches here, which is why I skip 2 stitches on each side of the shell, making 5 stitches altogether. I skip 2 and work 1 dc into each of the next 30 stitches. Then I make the second shell: skip 2, then 2 dc, ch 1, 2 dc into the same stitch. I skip 2 again and work 1 dc into each of the last 15 stitches. I finish the round with a sl st.
The next six rounds: These are exactly the same as Round 2, with the same stitch count: ch 2 as the turning chain, turn, 15 dc, shell, 30 dc, shell, 15 dc, and sl st to finish the round. The only difference is where the shells go. In Round 2 the shells were made into the single crochet stitches below. In the following rounds, the shells are made around the ch-1 space from the row below, which sits right in the middle of the shell and is easy to find. You can work into the chain, but I find it much easier to crochet around it.
The Legs
The pattern for both legs is the same. I work the first leg and then start the second one.
Placing the markers: I use 4 stitch markers, 2 for the front and 2 for the back. The side with the yarn tail is the back. I place one marker on each side of the slip stitch. Then I count 15 double crochet stitches, one shell, and 15 double crochet stitches on each side. I place a marker into the last stitch of each count, which is stitch number 15, and I do the same on the other side.
I place the pants in front of me with the back side up. I open the stitch marker on the left side and save it for later. Then I insert the hook into the same stitch and attach the yarn with 2 ch, which also serves as the turning chain.
Round 1: I work 1 dc into each of the next 15 stitches, starting in the same stitch as the turning chain. Then I make a shell: skip 2, then 2 dc, ch 1, 2 dc around the ch-1 space of the shell from the row below. I skip 2 stitches and work 1 dc into each of the next 14 stitches.
Only one stitch is left, and it’s a little different. Here I want to join the end of the round to the very first stitch of the round, which separates the two legs without leaving a big hole between them. I yarn over and insert the hook into the stitch below and into the bottom of the very first stitch of this round. Then I yarn over, pull the loop through, and finish the double crochet. Both ends of the round are now nicely joined, and I finish the round with a sl st.
Round 2 (with decreases): I ch 2 and turn. I skip the slip stitch from the row below and join 2 dc stitches together:
- Yarn over, insert the hook into the stitch, yarn over and pull through, then yarn over and pull through the first 2 loops.
- Yarn over, insert the hook into the next stitch, yarn over and pull through, then yarn over and pull through the first 2 loops.
- You now have 3 loops on the hook. Yarn over one last time and pull through all the loops.
Then I work 1 dc into each of the next 13 stitches. I make a shell: skip 2, then 2 dc, ch 1, 2 dc into the same stitch. I skip 2 and work 1 dc into each of the next 13 stitches. I join the last 2 stitches with a dc2tog and finish the round with a sl st.
Round 3: I ch 2, turn, and work 1 dc into each of the next 14 stitches. Then I make a shell: skip 2, then 2 dc, ch 1, 2 dc around the ch-1 space from the row below. I skip 2 and work 1 dc into each of the next 14 stitches. I finish the round with a sl st.
Round 4 (with decreases): I ch 2 and turn. I join the first 2 stitches with a dc2tog, making sure to skip the slip stitch at the beginning of the round, otherwise I would add an extra stitch. Then I work 1 dc into each of the next 12 stitches. I make a shell: skip 2, then 2 dc, ch 1, 2 dc around the ch-1 space from the row below. I skip 2 stitches and work 1 dc into each of the next 12 stitches. I join the last 2 stitches with a dc2tog and finish the round with a sl st.
Round 5: I ch 2 and turn. I skip the slip stitch at the beginning of the round and work 1 dc into each of the next 13 stitches. I make a shell: skip 2, then 2 dc, ch 1, 2 dc around the ch-1 space from the row below. I skip 2 stitches and work 1 dc into each of the next 13 stitches. I finish the round with a sl st.
Round 6 (with decreases): I ch 2 and turn. I join the first 2 stitches with a dc2tog, again skipping the slip stitch at the beginning of the round. Then I work 1 dc into each of the next 11 stitches. I make a shell: skip 2, then 2 dc, ch 1, 2 dc around the ch-1 space from the row below. I skip 2 stitches and work 1 dc into each of the next 11 stitches. I join the last 2 stitches with a dc2tog and finish the round with a sl st.
Round 7 (last round): I ch 2 and turn. I join the first 2 stitches with a dc2tog. Then I work 1 dc into each of the next 10 stitches. I make a shell: skip 2, then 2 dc, ch 1, 2 dc around the ch-1 space from the row below. I skip 2 stitches and work 1 dc into each of the next 10 stitches. I join the last 2 stitches with a dc2tog and finish the round with a sl st.
Finishing the first leg: I cut the yarn, fasten off, and hide the yarn tail between the stitches. If you think the leg isn’t quite long enough, you can add a few rounds of double crochet stitches to make it longer. You don’t need to make any decreases in those extra rounds, just simple double crochet stitches.
The second leg: The side with the seam should always be on the back of the pants. I place the pants in front of me right side up and insert the hook into the stitch marked with a stitch marker. I attach the yarn with ch 2 and repeat the same steps I made for the first leg. The pattern is the same for the left and right leg.

Wearing Your Baby Leggings
These little leggings are perfect for pairing with a simple onesie or a soft top. The stretchy ribbed waistband makes them easy to wear. They also make a thoughtful handmade gift for a baby shower or a new arrival, and the shell stitch makes them look extra special. If you’d like to make a pair in a different color, soft neutrals or gentle pastels would look just as sweet.
Keeping Your Baby Leggings Fresh and Lovely
Cotton yarn is lovely for little ones, so I always check the care instructions on the yarn label before washing. I like to wash handmade baby items gently and reshape them while damp. Then I lay them flat to dry so the shells keep their pretty shape and the ribbing stays nice and stretchy. Store them folded in a drawer rather than hanging them, so the fabric doesn’t stretch out of shape.
If you enjoyed this pattern, I’d love for you to save it to Pinterest so you can find it again when you’re ready to start. And when you finish your own pair, please share it with me. I’d love to see your little leggings in your favorite colors.
Follow us on Pinterest and subscribe to the Newsletter so you don’t miss a thing!
3 Comments