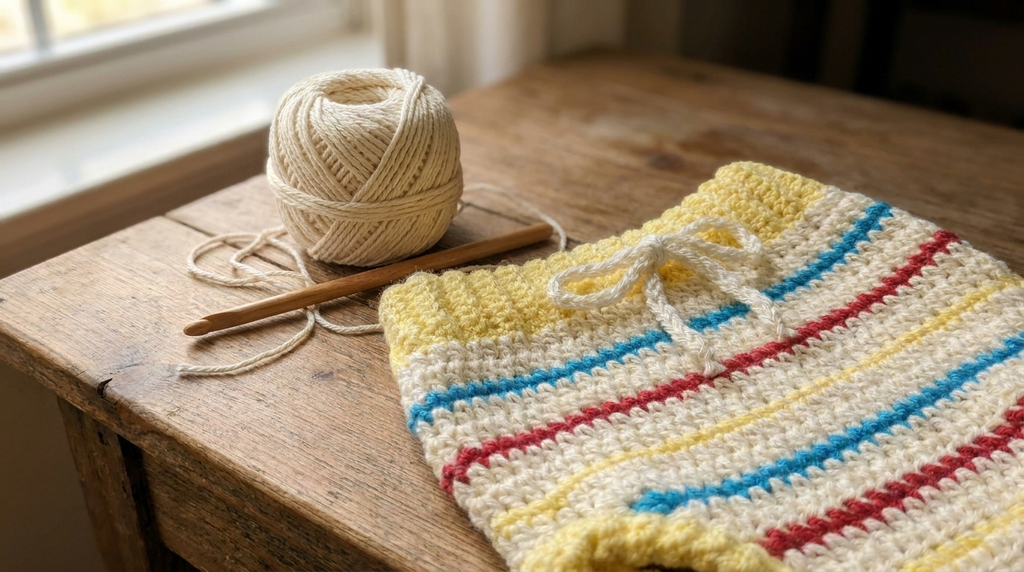
The Baby Pants
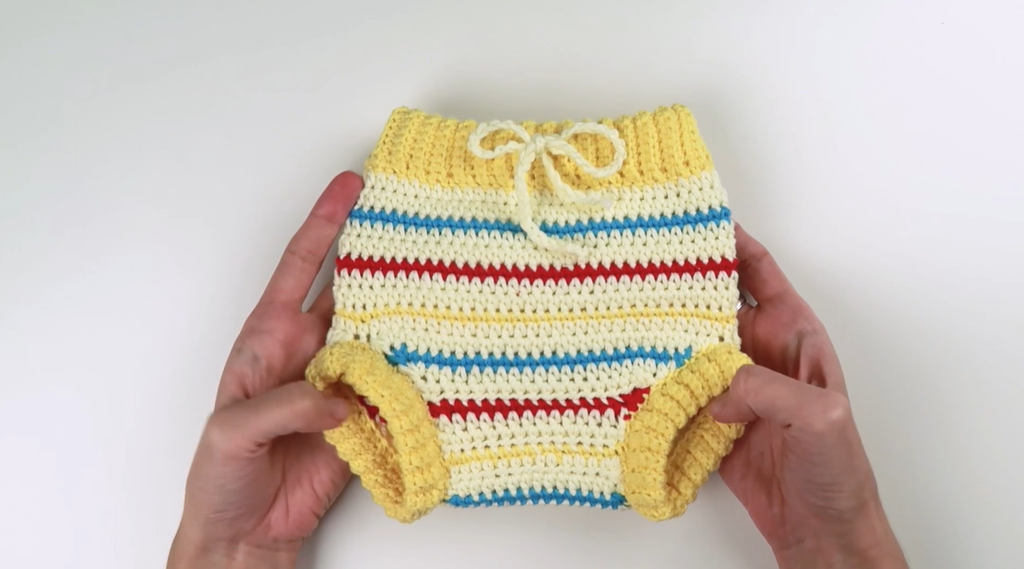
These pants use four colors of yarn: dark yellow, light yellow, blue, and red. The main part is worked in soft light yellow stripes of half double crochet, broken up by single crochet rows in dark yellow, blue, and red. There is ribbing at the waist and around both leg holes, and inside the waist ribbing runs a chain you can tie in a bow, so you decide how snug the fit is. I used dark yellow for all the ribbing, but any colors you love will work, as long as you keep the same yarn weight and hook sizes.
Related Posts:
- Crochet Baby Hat: A Cozy Little Beanie for Tiny Heads
- Crochet Baby Romper: Sweet Stripes for Tiny Wiggles
- Crochet Baby Booties: Tiny Steps in Soft Yarn
- Crochet Ridge Stitch Blanket: A Soft Baby Blanket Crochet Pattern
Materials and Tools
- DK weight yarn for the ribbing and the small section of the main part
- Four colors: dark yellow, light yellow, blue, and red
- 4 mm and 3 mm crochet hooks
- Safety pin, scissors, yarn needle, and a bunch of stitch markers
Stitch by Stitch

- ch, sl st, sc, hdc: used throughout. The joining sl st of a round does not count as a stitch.
- hdc2tog and hdc3tog: decreases on the front and back lower pieces
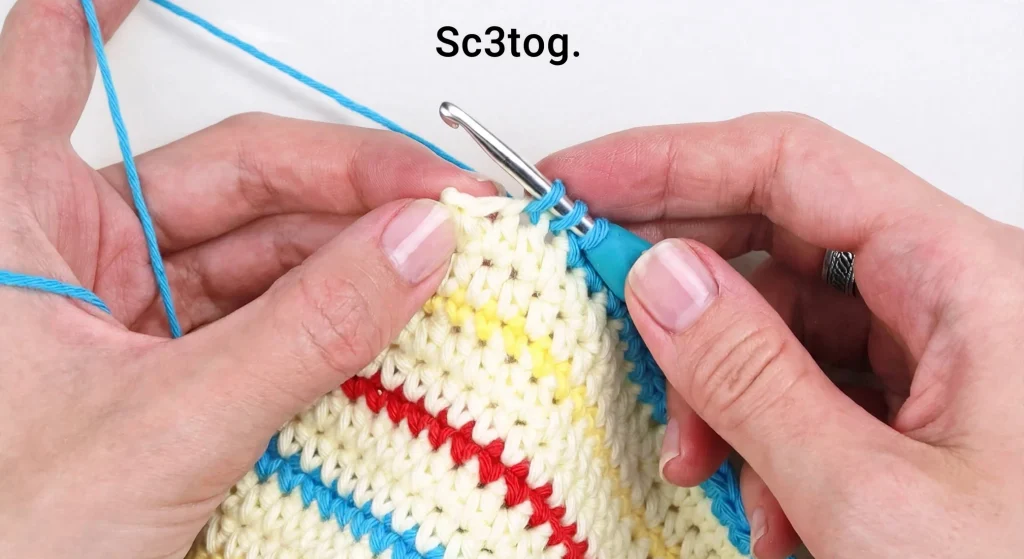
- sc2tog and sc3tog: decreases in the single crochet rows of the lower pieces
- 2 hdc in the same stitch: the increases in the last row of the front lower piece
- Back loops only: every ribbing row from Row 2 onward, for the ridged look
- Blanket stitch: joining the front and back pieces
Construction
Waist Ribbing (DK yarn, 3 mm hook)
- Ch 15. Half the length of this foundation chain is the height of the ribbing.
- Row 1: Sc in the second chain from the hook and in each of the next 14 stitches. Mark the first stitch.
- Row 2: Ch 1, turn, and sc in each of the next 14 stitches in back loops only. Repeat Row 2 thirty-two more times, for 34 rows in total.
- Row 35: Ch 1, turn. Sc in the first three stitches (back loops only) and mark the first one. Ch 1, skip one stitch, then sc in each remaining stitch. This ch 1, skip 1 is where the chain goes in later.
- Repeat Row 2 three more times, marking the first stitch. Repeat Row 35 once more for the second hole.
- Keep repeating Row 2 until you have 66 rows in total.
- Join the ends: Ch 1, then sl st in each of the 14 stitches through both layers, in front loops only. Back loops work too, as long as you stay consistent.
- Make the tube: Fold the ribbing in half, with the hole markers on the outside. Ch 1, then hdc in each row of sc all the way around, through both layers. You need exactly 66 hdc, one per ribbing row.
Main Part: Waist Rounds
Every round has 66 stitches, with no increases or decreases.
- Before finishing the joining sl st, pull light yellow through both loops on the hook to change color. Ch 1. (Or finish the sl st, cut the yarn, and attach the new color in the first stitch.)
- Rounds 2 and 3: Hdc in each of the 66 stitches in light yellow, joining each round with a sl st into the first stitch. Don’t work into the joining sl sts.
- Round 4: Change to blue, ch 1, and sc in each of the 66 stitches.
- Next come seven more rounds:
- Two rounds of hdc in light yellow
- One round of sc in red
- Two rounds of hdc in light yellow
- One round of sc in dark yellow
- One round of hdc in light yellow, then fasten off
Front Lower Part
The color order is two rows of hdc in light yellow, then one row of sc in red, dark yellow, or blue. Use four stitch markers to mark 30 stitches for the front and the remaining 36 stitches for the back.
- Row 1: Join light yellow in the first marked stitch, ch 1. Hdc3tog, hdc in each of the next 24 stitches, hdc3tog. Mark the last stitch, not the loop from changing yarn.
- Row 2: Without turning, join blue in the first stitch, ch 1. Sc3tog, sc in each of the next 20 stitches, sc3tog. Fasten off and mark the last stitch.
- Row 3: Join light yellow. Hdc3tog and mark the first stitch, hdc in each of the next 16 stitches, hdc3tog.
- Row 4: Ch 1, don’t cut the yarn, turn. Hdc2tog, hdc in each of the next 14 stitches, hdc2tog. Fasten off and mark the last stitch.
- Row 5: Turn so the nicer side faces you. Join red in the marked stitch on your right, ch 1. Sc2tog, sc in each of the next 12 stitches, sc2tog. Fasten off.
- Rows 6 and 7: Join light yellow in the marked stitch on your right, ch 1. Starting in the same stitch, hdc in each of the next 14 stitches. Turn and repeat for Row 7.
- Row 8: Join dark yellow in the marked stitch, starting in the same stitch. Sc in each of the next 14 stitches. Fasten off and mark the last stitch. Turning is optional.
- Rows 9 and 10: Join light yellow, ch 1, and hdc in each of the next 14 stitches. Ch 1, turn, and repeat for Row 10.
- Row 11: Fasten off and mark the last stitch. Join blue, ch 1, and sc in each of the next 14 stitches. Fasten off and mark the last stitch.
- Row 12: Join light yellow, ch 1. Work 2 hdc in the first stitch, hdc in each of the next 12 stitches, then 2 hdc in the last stitch. Fasten off.
Back Lower Part
This part has 10 rows. Each row starts and ends with a decrease (sc2tog or hdc2tog), with one stitch worked into each stitch in between. The color order is the same as the front. Don’t cut the yarn between the two light yellow rows, and always cut it and start in the first stitch when changing color.
- Row 1: With the front facing you, join light yellow in the stitch on your right, ch 1. Hdc2tog, hdc in each of the next 32 stitches, hdc2tog.
- Continue through Row 10. Fasten off, leaving a long tail for sewing, much longer than you think you need.
Joining Front and Back
Turn the pants inside out and always sew on the inner side so the seams look clean. Use a blanket stitch through both layers at once, then secure the yarn end between the stitches. If your tail is too short, use more yarn from the light yellow skein.
Leg Ribbing (make 2, dark yellow, 3.0 mm hook)
- Ch 9. Row 1: Sc in the second chain from the hook and in each of the next 7 stitches (8 stitches).
- Row 2: Ch 1, turn, and sc in each of the next 8 stitches in back loops only. Repeat Row 2 thirty-nine more times, for 41 rows in total.
- Ch 1 and join both ends with a row of sl st in back loops only.
- Ch 1, fold the ribbing in half lengthwise, and sc in each of the next 41 rows. Join with a sl st, then fasten off, leaving a long tail for sewing.
Attaching the Leg Ribbing
Turn the pants inside out and insert a ribbing into a leg opening, with the sc round facing out. Thread the tail onto the yarn needle and sew around the opening, going through both layers. Repeat for the second leg.
The Waist Chain
- In light yellow with the 3 mm hook, ch 110. Tie a simple knot at each end.
- Attach a safety pin through the middle of one knot (a little masking tape keeps it closed).
- Insert the pin and chain into the first opening in the ribbing, remove the first stitch marker, drag the chain all the way around, and pull it out through the next opening.
- Even out the two ends and tie the chain in a bow.
Wearing Your Baby Pants
These pants are sweet with a little onesie or soft top, and the tie waist lets you adjust the fit. They also make a lovely handmade gift for a baby shower or a new arrival.
Keeping Your Baby Pants Fresh and Lovely
Check your yarn’s care label, then wash gently by hand or on a delicate cycle with mild soap. Reshape while damp and lay flat to dry so the ribbing keeps its stretch. You can remove the waist chain before washing and thread it back in once dry.
I hope you enjoy making these as much as I do. Save this pattern to your Pinterest board so you can find it again, and please share your finished little pants with me. I would love to see your color choices.
Follow us on Pinterest and subscribe to the Newsletter so you don’t miss a thing!
4 Comments