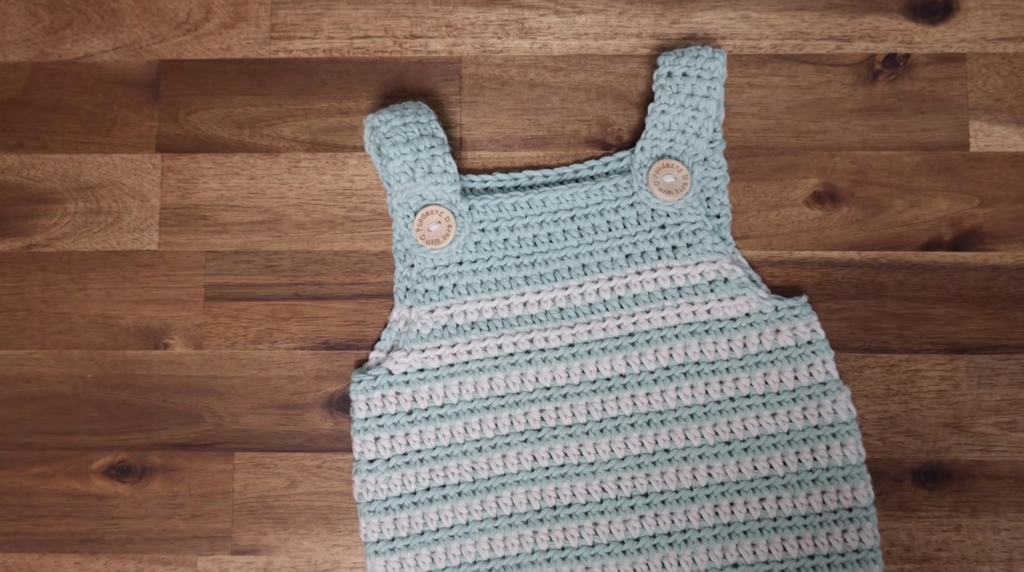
The Baby Romper
This romper is made almost entirely with half double crochet stitches, which gives it a soft, dense, comfortable fabric that feels lovely against a baby’s skin. I work it in two colors and switch between them every row and round, so the stripes appear on their own as you go. I used green and beige, but you can pick any colors you like. This pattern is for size 0 to 6 months.
The romper starts with two leg panels, which are joined into one main body worked in the round. Then the upper front and back are worked flat, followed by two little straps with buttonholes. Finally, the legs are sewn up, and you have a snug little outfit.
Related Posts:
- Crochet Baby Hat: A Cozy Little Beanie for Tiny Heads
- Crochet Baby Pants: Ribbed Little Pants with a Tie Waist
- Crochet Baby Leggings: Soft Shells and a Stretchy Waistband
- Crochet Baby Booties: Tiny Steps in Soft Yarn
Materials and Tools
- Worsted weight yarn: I used 100% cotton yarn, Drops Paris
- Three skeins in total: two in green and one in beige
- 4.5 mm crochet hook
- Scissors
- Tapestry needles
- Stitch markers
- Two buttons, 2 cm in diameter
Stitch by Stitch
- Chain (ch): the foundation chain, the starting chain of rows, the chain between the two panels, and the buttonhole chain
- Half double crochet (hdc): the main stitch of the whole project, used for the leg panels, the main part, the upper front and back, and the straps
- Two or three hdc in the same stitch: used for the increases in the leg panels and at the joins on the main part
- Half double crochet two together (hdc2tog): the decrease stitch, used on the hip rounds and at the start and end of the first three rows of the upper part
- Slip stitch (sl st): used to join each round, and to attach the buttonhole chain and finish the buttonhole row
- Single crochet (sc): worked around the chain to make the buttonhole
Construction
Leg Panels (make 2)
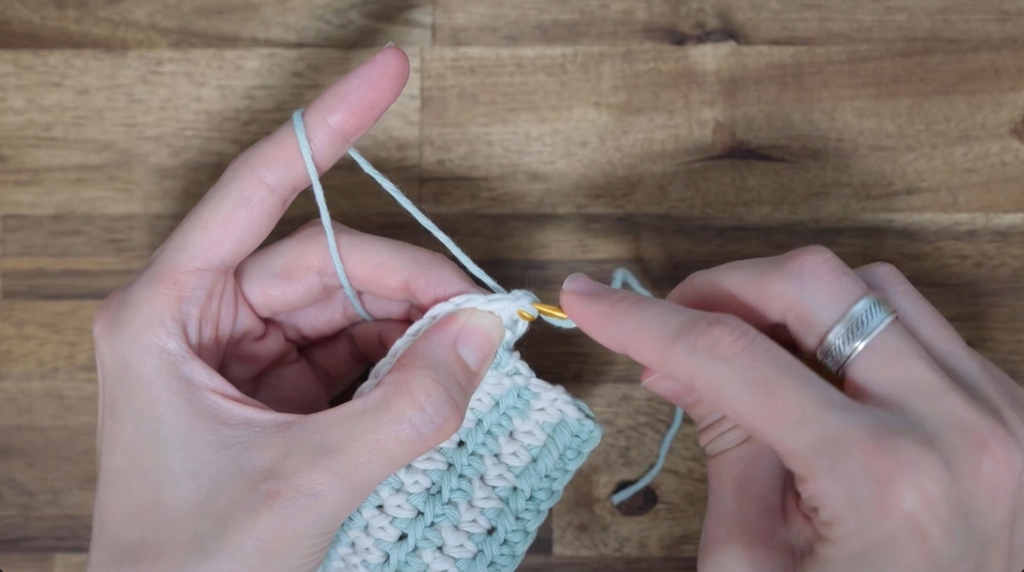
Begin with the main color. In my case that is green. Make a foundation chain of 25. Start in the second chain from the hook. The loop on your hook does not count as a chain. Work 1 hdc into each chain across. I work into the back bumps of the foundation chain for this first row, but you can use any loops you like as long as you end up with 24 hdc. At the end of the row, switch color.
Work the first four rows (including that first one) the same way, with 24 hdc in each row. Switch colors at the end of every row.
Row 5 (first increase row): Work 2 hdc into the first stitch, 1 hdc into each of the next 22 stitches, and 2 hdc into the last stitch.
Row 6: Work 3 hdc into the first stitch, 1 hdc into each of the next 24 stitches, and 3 hdc into the last stitch. This gives you 30 stitches in total.
Cut the yarn and fasten off. The first panel is complete. Make the second panel exactly the same way.
Main Part
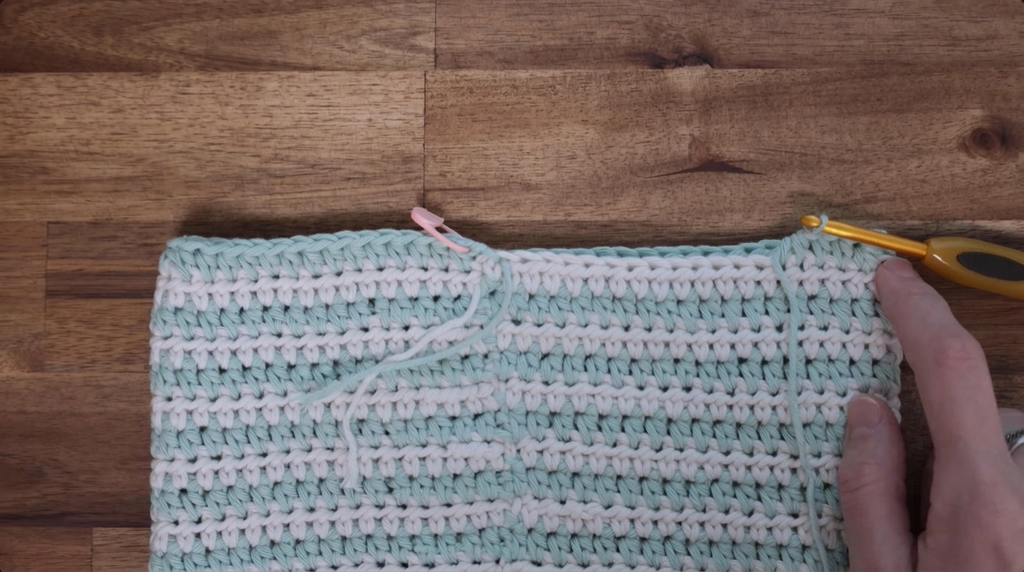
Now we join both panels together. Make a slip knot and ch 1. Attach to the first panel with an hdc, making sure the loops stay wrapped around your hook the whole time. I hold them with my index finger while holding the hook. Work 2 more hdc into that same stitch. Then work 1 hdc into each of the next 28 stitches, with no increases for now, and work 3 hdc into the last stitch.
Ch 1. Attach the second panel with an hdc in the same way, then work 2 more hdc into that same first stitch. Work 1 hdc into each of the next 28 stitches, then work 3 hdc into the very last stitch of the row.
Join the round with a sl st into the very first chain of the round. Check that your work is not twisted. Just before you finish the slip stitch, switch color.
Round 2: Ch 1, then turn your work. Skip the slip stitch from the round below and work 1 hdc into every stitch and chain from the round below. You should have 70 stitches in total. Join with a sl st, and switch color just before finishing it.
Repeat this round 14 more times. This takes you through round 16. Keep switching between your two colors every round.
Round 17 (decrease round on the hips):
- 1 hdc into each of the next 15 stitches
- hdc2tog
- 1 hdc into each of the next 2 stitches
- hdc2tog
- 1 hdc into each of the next 29 stitches
- hdc2tog
- 1 hdc into each of the next 2 stitches
- hdc2tog
- 1 hdc into each of the next 14 stitches
- Join the round with a sl st
Rounds 18 and 19: Work 1 hdc into each of the next 66 stitches.
Round 20 (decrease round):
- 1 hdc into each of the first 14 stitches
- hdc2tog
- 1 hdc into each of the next 2 stitches
- hdc2tog
- 1 hdc into each of the next 27 stitches
- hdc2tog
- 1 hdc into each of the next 2 stitches
- hdc2tog
- 1 hdc into each of the next 13 stitches
This gives you 62 stitches in total.
Work two more rounds of 1 hdc into each of the 62 stitches, still switching colors every round. Then cut the yarn and fasten off.
Upper Front and Back
Use four stitch markers to mark three stitches on each hip, with 28 stitches between the markers on each side. The side with the joining seam is the back of the romper, and the other side is the front. You can decide which is the inside and which is the outside.
Front, Row 1: Attach the yarn next to a stitch marker with a simple chain. Work hdc2tog, then 1 hdc into each of the next 24 stitches, and finish with hdc2tog.
Row 2: hdc2tog, 1 hdc into each of the next 22 stitches, hdc2tog.
Row 3: hdc2tog, 1 hdc into each of the next 20 stitches, hdc2tog.
Switch colors every row through row 3, then switch the color one last time after row 3 and continue with that same color.
Rows 4 to 8: Work 1 hdc into each stitch. Cut the yarn and fasten off.
Back: Rows 1 to 8 are exactly the same as the front. After row 8, work a row of hdc two more times.
Straps (make 2)
Each strap is made of eleven rows of hdc plus one buttonhole row. Start each row with ch 1, then work 1 hdc into each of 4 stitches. Turn your work after each row.
Row 12 (buttonhole row): Work 1 hdc into each of the 4 stitches. Then ch 5 and attach the chain to the first stitch of the row with 2 sl st. Turn your work and crochet around the chain, working 8 sc around it. Finish the row with 2 sl st made into the side of the strap. Cut the yarn and fasten off.
For the second strap, skip 14 stitches on the back upper part and attach the yarn to the romper. Repeat the same steps as for the first strap.
Once both straps are complete, sew the buttons onto the front upper part of the romper.
Sewing the Leg Panels
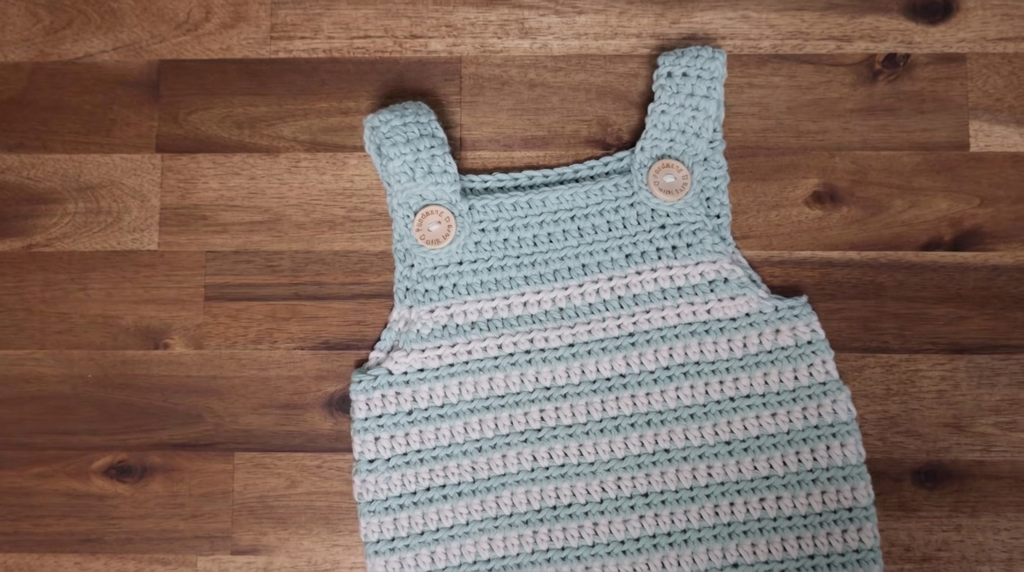
Turn the romper inside out so the nicer side faces in. Sew the leg panels, sewing and gathering the rows and stitches twice. Join the slip stitches made with green yarn to green, and the stitches made with beige yarn to beige. Then turn the romper right side out, and your romper is finished.
Wearing Your Baby Romper
This romper is a sweet everyday outfit for a little one, and it’s equally lovely as a handmade baby shower gift. Pair it with a long-sleeved onesie underneath on cooler days, or let it stand on its own when the weather is warm. Because the colors are totally up to you, you can match it to a nursery palette, a favorite season, or a special occasion. It would also make a charming photo outfit for those first precious months.
Keeping Your Baby Romper Fresh and Lovely
Cotton yarn is a wonderful choice for baby items because it is soft and easy to look after. Check the care label on your yarn first, and wash the romper gently, ideally in cool water on a delicate cycle or by hand. Avoid wringing it out, and lay it flat to dry so it keeps its shape. Do up the buttons before washing so they stay safely in place, and check them from time to time to make sure they are still firmly attached.
I would love for you to save this pattern to your Pinterest board so you can come back to it whenever you need a little handmade gift idea. When your romper is finished, please share it with me. Seeing your creations makes my day!
Follow us on Pinterest and subscribe to the Newsletter so you don’t miss a thing!
4 Comments