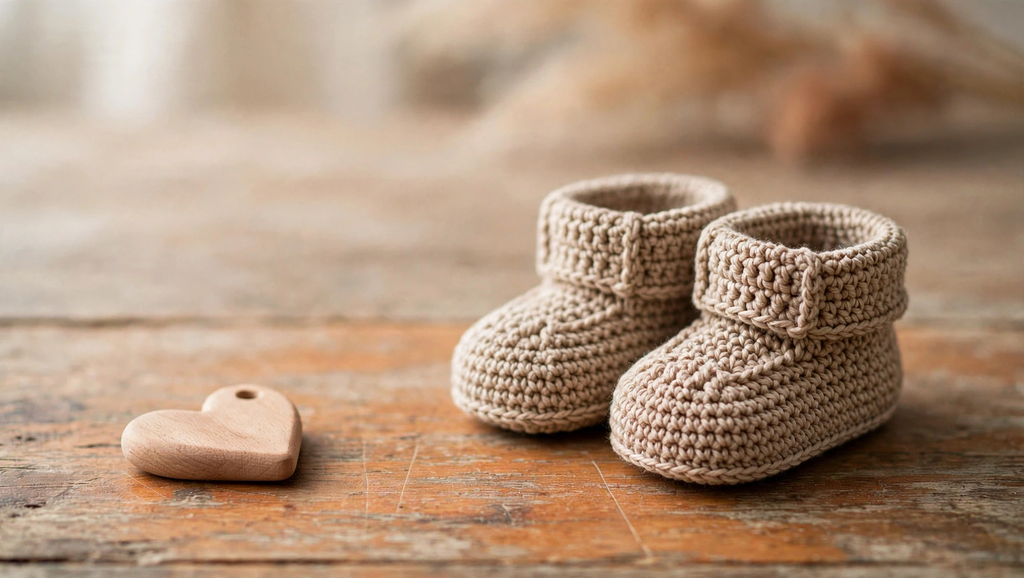
Baby booties are one of those projects that make my heart melt, and this little pair works up quickly in simple rounds. They come in three sizes and use just a handful of basic stitches, so they’re perfect for a cozy afternoon of crocheting.
The Baby Booties
These booties are worked in the round from a simple chain, with the toe shaped by a few gentle decreases. A round of back loop double crochet creates a neat ridge where the sole meets the sides, and the rest is worked in single crochet for a snug, tidy fabric. Soft baby yarn in pastel shades, creamy neutrals, or sweet whites would suit them beautifully.
They come in three sizes: newborn, 0 to 3 months, and 3 to 6 months. The only thing that changes between sizes is your hook. These booties are also part of a matching set with a little cardigan, a hat with a pom pom, and a baby blanket, so you can make a whole gift collection.
Related Posts:
- Crochet Baby Leggings: Soft Shells and a Stretchy Waistband
- Crochet Baby Pants: Ribbed Little Pants with a Tie Waist
- Crochet Baby Hat: A Cozy Little Beanie for Tiny Heads
- Crochet Baby Romper: Sweet Stripes for Tiny Wiggles
Materials and Tools
- Light worsted, double knit (DK), also known as 8 ply yarn. I used Deramores Studio Baby Soft Double Knit, but any category 3 yarn will work.
- Crochet hook, depending on the size you want to make:
- Newborn: 3 mm hook
- 0 to 3 months: E hook (3.5 mm)
- 3 to 6 months: G hook (4 mm)
- Scissors
- Tapestry needle for weaving in your ends
- Plastic baby shoe inserts (optional) for shaping the finished booties

Stitch by Stitch
- Slip knot: to begin
- Chain (ch): the foundation chain of 11, plus the turning chains at the start of each round
- Double crochet (dc): rounds 1 and 2, worked into the foundation chain and then into the stitches of round 1
- Back loop double crochet: round 3, worked into the back loops only
- Single crochet (sc): rounds 4 to 17
- Double crochet two together (dc2tog): the decreases that shape the toe in rounds 4 to 7
- Slip stitch (sl st): to join each round
Construction
Each bootie is worked in joined rounds from start to finish. Remember that the chain 3 at the start of rounds 2 and 3, and the chain 1 at the start of the later rounds, does not count as a stitch.
Round 1

Make a slipknot and chain 11. Work 1 dc into the fourth chain from the hook, then work 1 dc into each of the next 6 chains. Work 8 dc into the last chain. Now work up the other side of the foundation chain: work 1 dc into each of the next 6 chains, going under both loops of the chain. Work 7 dc into the last chain, again under both loops. To close the round, skip the 3 chains you skipped at the beginning and sl st into the top of the first dc you made. You should have 28 stitches.
Round 2
Ch 3 (does not count as a stitch). Work 2 dc into the same stitch, which is the stitch at the base of the chain 3. Work 1 dc into each of the next 6 stitches. Work 2 dc into each of the next 8 stitches. Work 1 dc into each of the next 6 stitches. Work 2 dc into each of the next 7 stitches. To join, skip the chain 3 at the beginning and sl st into the top of the first dc of the round. You should have 44 stitches.
Round 3
Ch 3 (does not count as a stitch). Work 1 back loop double crochet into each of the next 44 stitches, working into the back loops only. To join, skip the chain 3 and sl st into the top of the first back loop dc you made. You should have 44 back loop double crochet stitches.
Round 4
Ch 1 (does not count as a stitch). Work 1 sc into the same stitch, then 1 sc into each of the next 7 stitches. Now shape the toe by working dc2tog a total of 8 times.
To make a dc2tog: yarn over, insert your hook into the next stitch, and pull up a loop (3 loops on your hook). Yarn over and pull through 2 loops (2 loops on your hook). Yarn over, insert your hook into the next stitch, and pull up a loop (4 loops on your hook). Yarn over and pull through 2 loops (3 loops on your hook). Yarn over and pull through all 3 loops.
After your 8 decreases, work 1 sc into each of the next 20 stitches. Join with a sl st into the top of the first sc of the round. You should have 36 stitches.
Round 5

Ch 1. Work 1 sc into the same stitch, then 1 sc into each of the next 7 stitches. Work dc2tog 4 times. Work 1 sc into each of the next 20 stitches. Join with a sl st to the first sc. You should have 32 stitches.
Round 6
Ch 1. Work 1 sc into the same stitch, then 1 sc into each of the next 7 stitches. Work dc2tog twice. Work 1 sc into each of the next 20 stitches. Join with a sl st to the first sc. You should have 30 stitches.
Round 7
Ch 1. Work 1 sc into the same stitch, then 1 sc into each of the next 7 stitches. Work dc2tog once over the next 2 stitches. Work 1 sc into each of the next 20 stitches. Join with a sl st to the first sc. You should have 29 stitches.
Round 8
Ch 1. Work 1 sc into the same stitch, then 1 sc into each of the next 28 stitches, which means one sc into each stitch all the way around. Join with a sl st to the first sc of the round. You should still have 29 stitches.
Rounds 9 to 17

Repeat round 8 for each of these rounds: ch 1, 1 sc into the same stitch, 1 sc into each of the next 28 stitches, and join with a sl st to the first sc. You should have 29 stitches at the end of every round.
Finishing
After round 17, cut your yarn and fasten off. Thread the tail onto your tapestry needle and weave it into the inside of the bootie. Repeat for the second bootie.
To shape the finished booties, I like to use plastic baby shoe inserts. You can find them on Amazon, and sometimes they come with baby socks or shoes. I pop them into the booties and leave them overnight. When I take them out, the booties have a lovely rounded toe and a nice little shape.
Wearing Your Baby Booties
These booties make a sweet gift for a baby shower or a new arrival, especially paired with the matching cardigan, pom pom hat, and blanket. They’re also wonderful as a keepsake for a first photo session or as a cozy extra layer for tiny feet in cooler weather.
Keeping Your Baby Booties Fresh and Lovely
Check your yarn label for care instructions before washing, since baby yarns can vary. In general, I recommend washing gently by hand or on a delicate cycle, and reshaping the booties while they’re still damp. Let them dry flat away from direct heat, and you can use the shoe inserts again to bring back that rounded toe.
I hope you enjoy making these little booties as much as I do. Save this pattern to your Pinterest board so you can find it whenever you need a quick, sweet gift, and please share your finished booties with me. I’d love to see them in your favorite colors.
Follow us on Pinterest and subscribe to the Newsletter so you don’t miss a thing!
4 Comments